Showing posts with label tutorial. Show all posts

Tuesday, December 16, 2014

Fancy'in Up The House! Pillow Tutorial

 I've said it before and I'll say it again.


 I love to decorate and bake and give and sit in the sparkle.
 Decorating the house is a lot of fun....and I found the easiest, most funnest, super simplest tutorial that looks AMAZING when they're done..... SPROCKET PILLOWS!!!


I made a few for gifts last year, and when I pulled out mine to add to our festive decor, I *knew* I had to share the joy of making them. Even if you're not a strong in the sewing area; this is a super easy project to make.
This tutorial is courtesy of the AMAZING Allison at Cluck Cluck Sew.
Her photos and step by step instructions make everything easy and understandable.


The bottom centre one is Mine. :)

Happy Sewing & Decorating!


Sunday, November 23, 2014

Easy Cotton Infinity Scarf...and a tutorial!

They're everywhere.
Infinity scarves. Don't resist. You can't resist. You really shouldn't anyway.

As a former fashion consultant; let me tell ya. A scarf can really update your outfit, make a statement, and change your look in one of the easiest possible ways.
Check it out.
A simple 3/4 sleeve T is instantly updated.
As you prolly already know...I am in LOVE with the "Outlander" TV series.
It inspired me to knit up some infinity scarves like a maniac recently.
See? Look how happy wearing a scarf makes you.


But indoors it's sometimes too warm to wear a bulky knit; or you want something a little less...well, knitted.

So here's the solution - you'll see these everywhere in Blogland & also in the malls.

A super light, easy wear scarf, that still does the job of keeping you cozy.

You can use any light weight fabric you like; I recommend voile, cotton or lawn, or anything else you'd prefer. You could even use several kinds, get creative...make a patchwork scarf!

I chose two contrasting prints of fine Indian cotton.


1. Choose two fabrics.

2. Cut one of each fabric - 9 inch by 72 inches.


3. Placing RIGHT sides together; sew using a 1/4 seam along both sides. Sew one end closed, and stopping the seam one inch from the top on both sides of the other end.


4.  Press seams, then turn scarf right-side-out.


5.  Press seams flat; insert a long knitting needle, or coat hanger, or dowel rod or whatever else you have on hand ( I used my long Omnigrid Ruler)  to get that side seam nice and crisp.
Turn the scarf back right sides out.

"Pinch" the edges of the scarf tightly so you can get a crisp edge.

6. Once you've gotten nice crisp edges; on your flat surface, either iron down or finger press down a half inch hem on the ends you left open. Do this by folding down one edge and folding down the other, pressing overtop to ensure they are the same. You're going to tuck in the sewn closed end into your open end.


7. Fold the scarf in half, tucking the sewn closed end into the open end flap. Pin in place.

The pattern makes it hard to see; so I wrote on the photo for ya.


8. You can either whipstich the end closed or what I did - which is sew a narrow topstitch to close and then do a decorative stitch overtop.


Et voila! Your scarf is pret a porter and loops well; two or even three times!
Two loop!

Three Loop!
Now go! 


Go and accessorize! 


Sunday, November 16, 2014

Outlander Knits - Easy Tutorial!

I love to read.
One series I have loved loved LOVED for years is Diana Gabaldon's "Outlander" series.
 When I was a kid, I spent my summers at the library, scouring the aisles for new stories and characters to take me away.... and as an adult I *still* love to read; however when I'm sewing, it's easier to listen to audiobooks.

And one series I have loved loved LOVED for years is Diana Gabaldon's "Outlander" series.


Ahhh Scotsmen. Kilts. Bodice Ripping. Time Travel. Romance. Intrigue. History. A great mix.
And now, it's been brought to life in a great TV series, and in my humble opinion, they've done a great job of it all. From casting to locations to costuming. It's perfect.
And one thing I always notice are the costuming accessories...and in Outlander, I was not disappointed.  Oh my. Love them all.

The scarves! The knits! The shawls!


SO I was inspired to knit. And I like to knit, but I like easy and quick projects.
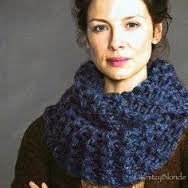
So here's my take on the current "Infinity Scarf/Cowl" trend; which is fashionable AND practical, especially if you live in a colder region like I do.

Here's some of my Outlander Tributes.


These are all on my Etsy shop.
 
 
Want your own Quick-Knit Cowl/Infinity Scarf? 
Here's how.
 
For a skinny scarf; about 6 inches wide and 24 inches long (48 inches circumference)
 2 balls 100g /3.5oz
For wider scarf, 12 inches wide same length
4 balls 100g/3.5 oz
Shown here with Isaac Mizrahi yarn & Loops & Threads Charisma.
I used several types; Bernat Softee Chunky, Loops & Threads Charisma to name a few.
 
 
1. Using HUGE 15mm needles; cast on two strands of the yarn you are using, 85 stitches.
 
2.Straight knit for approx 12 -15 rows for a narrower scarf. Straight knit approx 25 rows for wider scarf. Bind off when desired width is met.

3.Join ends by sewing together, using the 'tail' of the casting on or using the binding off tail.

Couldn't be easier!!
You can get fancy if you like, knit & purl for varying textures.
 Yes, you can use circular needles; then no need to join the ends. 
It all depends what you personally prefer.
 
 
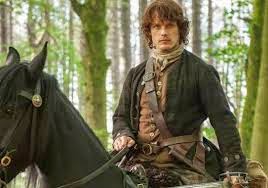
And now for your Sunday viewing pleasure; may I present Jamie Fraser, Lord of Lallybroch.

Brooding Scotsman, on the Moor. Yum.

Firelit Yum.

Yum on a horse.